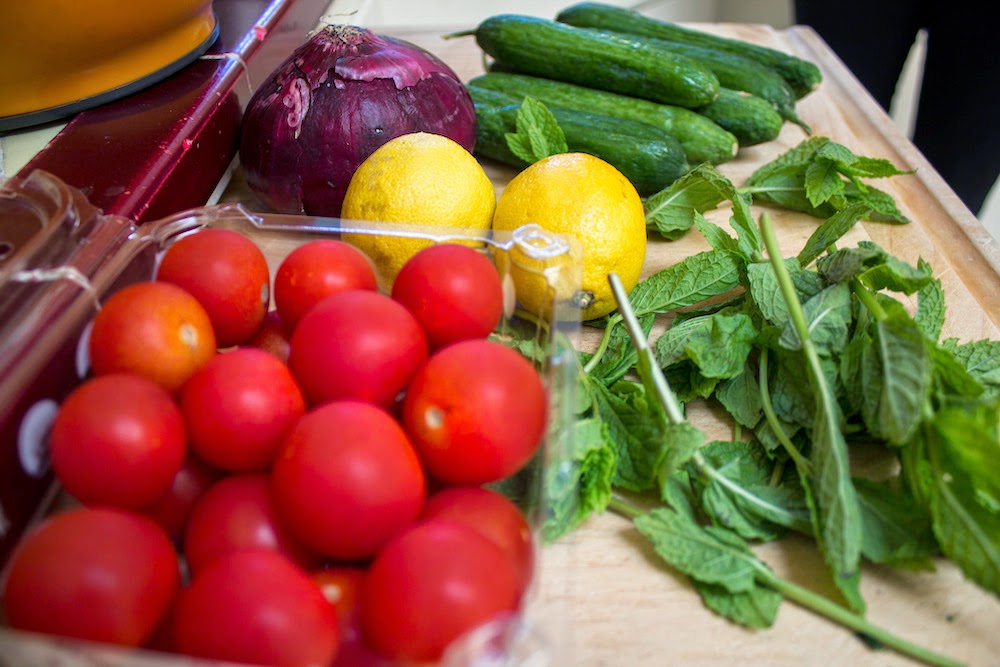
• Superfood Salad and Skin Treatment

  • Hollylujah! Onion Rings

  • Healthy Pad Thai

  • Zucchini Pasta with Walnut Pesto

5 More Kitchen Tools I Love


I did a post a few weeks ago on 5 of my favorite kitchen gadgets, but I knew I couldn't stop there. Here are 5 more tools I use (and love) in my kitchen:

  1. These gorgeous knives: I've had this Farberware Resin 3-Piece Set for over a year now, and still adore it. At the time I just needed a decent, affordable set of knives to hold me over until I could splurge on something more substantial, but they are holding up better than expected. It's fun to have knives as colorful as the vegetables they are chopping, and the resin coating is standing the test of time. Bonus: they come with individual sheaths to spare you from accidental cuts when storing them in a drawer.
  2. This enormous measuring cup: I was just looking for a regular 2-cup measuring cup when I stumbled upon this massive 8-cup one, and then I realized how often I'm measuring in quantities larger than 2 cups. So I bought both this one and a smaller one, and I no longer need to refill my little cups when I'm working with big portions. 
  3. The most versatile funnel: This 4-piece set can be adapted to any of your needs, and it's crazy awesome. I love to use all three funnel pieces when I'm making almond milk, so I can squeeze the nut milk from the bag right into a tiny bottle. The uses are endless. And bonus: it comes with a strainer attachment! Betcha didn't know funnels could be this good.
  4. This fancy corkscrew: My first corkscrew was cheap and seemed to destroy my wine corks or not fit over the bottle half the time. I decided it was time to find something more sophisticated, and  this one is the best deal around. It has a built-in blade to perfectly remove the foil at the top of the bottle, and then all you do is position the corkscrew over the top of the bottle and rotate the handle. In one motion it grabs the cork and removes it, flawlessly every time. It's a bit hit at parties.
  5. This bamboo kitchen tool set: I love to cook with wooden spoons and spatulas. They are sturdy like metal, but soft like plastic, yet they won't melt or scratch the pan. I got this set about a year ago, and it's fantastic. Very easy to use and clean. 

All images from Amazon.com


Hollylujah! Onion Rings

There's a burger spot in our neighborhood with vegan options, and my boyfriend and I like to go there after an active day, or when we're simply feeling indulgent. I love their vegan and portobello burgers, but their onion rings are the BEST, and probably the reason we go about once a month. They're beer-battered and deep fried and probably not even vegan though, so I've been jonesing to come up with a healthier alternative to make at home.

The idea to make them with almonds was always there, in order to lower the carbs and make the fats healthier. But I started off a bit over-zealous, planning to make the almond milk at home and dehydrate the leftover almond crumbles to turn into almond flour and a crunchy coating. This is exactly what I did, but it took forever, so next time I will probably simplify a bit. :) In fact, I have come up with a simple method, so I will share all of your options in this post, depending on where you fall on the zealous-ometer.

Note: I will continue to tweak this recipe and add more photos and an instructional video. But if you can't wait, give it a go!


On to the recipe...

Recipes of the moment: Jul 24

While I do have some exciting new recipes in the works this week, in between I've been trying some recipes from other bloggers in between. Here are two of recipes I'm trying at the moment:

  1. Yesterday I made my first batch of homemade coconut bacon, using this recipe from The Simple Veganista. It tastes eerily like bacon (granted, I haven't had the real thing in at least 5 years, but STILL). It's delicious, and dangerously addictive.
    Coconut Bacon

    It also made a great BLTA with hummus and red onions, which made quite a splash on instagram yesterday for some reason. I guess people can't resist a pretty sandwich!
  2. Yesterday's lunch: the BoLThA?
  3. Today I'm making a batch of raw portobello jerky, courtesy of Choosing Raw. The idea for this struck me when I was enjoying the meaty texture of my recent marinated portobello burgers. When I started my research, this recipe looked so much like what I wanted to create that I decided to just go with it. I marinated the sliced caps last night and they are currently in the dehydrator. The house is smelling SO smoky and jerkylicious as I type :)
    Raw portobello mushroom jerky
Today I'll be refining my healthy onion ring recipe, and assuming nothing goes horribly wrong, that recipe should be here tomorrow! Stay tuned!

To be continued...


Healthy Pad Thai? YES.

Hello hello! I am back from a wonderful visit in Los Angeles with friends and family. I was anxious to get back to cooking, so I stopped at the store on my way back into town and stocked up on a bunch of fresh ingredients to fill my week with new recipes. Among them was a spaghetti squash and some powdered low-fat peanut butter, both of which were calling me the next day when I was craving pad thai.

Pad thai is delicious, but never really considered healthy, so I was on a mission to reduce the guilt of this incredible dish as much as possible. Using baked spaghetti squash instead of rice noodles cuts the carbs down by about 30g per serving, and by using powdered peanut butter, the fat is reduced by 85%.

Here's a nutritional comparison for this recipe vs the same exact one prepared with regular peanut butter and rice noodles:

This recipe: 135 calories, 3g fat, 21.1g carbs (full nutrition facts at the end of this post)
Traditional: 430 calories, 16.7g fat, 55.9 carbs

The numbers don't lie. Onward to the recipe!


Lentil Walnut Burgers/Ninja Nuggets

The last few days before a vacation are a great opportunity for creative cooking. As I attempt to empty my fridge and pantry without having to buy more groceries, I always seem to discover or create new recipes that I continue to experiment with when I return.

I'm leaving for LA tomorrow, and I've already cleared out most of my perishables (hence the lack of exciting new recipe posts!), so I found myself experimenting with dry ingredients yesterday. I had a particular abundance of lentils and walnuts, so I started searching for a new burger recipe.

Enter Oh She Glows, one of my absolute favorite blogs, with a Lentil Walnut Burger recipe for which I had everything on hand. SOLD!

They look a bit like cookies, but they are delicious savory burgers, I promise!
I followed the recipe exactly, with one main exception: I didn't have bread crumbs. I had corn flakes, which I usually use as a substitute anyway, but I had something else I had been meaning to use up that would be perfect: almond pulp! This is the by-product of making almond milk: dry, crumbly almond bits that can be ground into almond meal or flour, and, so I've heard, used in place of bread crumbs in recipes. It's incredibly versatile stuff, so I like to keep it around.

So since that's the only sub I made, you can grab the recipe here, and substitute the bread crumbs, or not. The almond pulp worked great, and the recipe held together really well.


Oh, that brings me to this other thing I tried...I got these ninjabread men cookie cutters a while back, and have been meaning to use them. Since the batter was so solid and cookie dough-like, I molded some of it into ninjas. :) Ninja nuggets! I'm going to have to play with this idea a bit more and bread them next time. These were way too much fun to play with...

This is what happens when you put all of your ninja nuggets on the same plate...

And that's it! I'm off to pack for LA, and hopefully I'll have some delicious new posts for you while I'm gone. Have a great week!

Graphic: How to cut an avocado (without peeling!)

It's been a busy few days, so most of my meals have been quick and on the run. No new recipes worth posting, but maybe I'll share a roundup of my quick meal staples soon. One of those quick meals was a tomato and avocado salad, which required a quick dicing of this avocado without making a mess. Here's how I do it, with a handy Pinterest-friendly graphic:

  1. Start with a sharp knife and a ripe avocado.
  2. Slice off the tip and cut the avocado around lengthwise.
  3. Twist and separate the halves.
  4. Remove the pit with the knife.
  5. Gently dice or slice the avocado right in the skin.
  6. Scoop out the pieces with a large spoon.
  7. Enjoy!

I don't think this is the best or only way to do it, but it certainly is my favorite. How do you like to cut your avocado?


Marinated Portobello Burgers Recipe

My adventures in creating recipes from farmer's market finds continue...

There was a mushroom stand on Sunday with baskets of various mushroom varieties, all marked at $5 a basket. There was only one portobello basket left, and it was mine. I knew right away that they would become burgers, so all that was left was to decide on a marinade. Here's what I came up with...

Why I put the lettuce on the bottom, I'll never know.
Onward to the recipe!

Mediterranean Grilled Veggie Bowl with Tahini Sauce

I was a bit tired last night and trying to come up with a last-minute dinner that could use the leftover zucchini from this pasta, as well as the red pepper and eggplant I got at the farmers market on Sunday. I found this recipe, which I could make with a few substitutions, so I went for it. It is absolutely delicious and I suggest you try it if you enjoy mediterranean flavors. Rather than retype the recipe (maybe I'll update it later, but I don't have time today), here are the substitutions I made:


Mediterranean Grilled Veggie Bowl with Tahini Sauce (Adapted from Chow)

(Click the link if you want the original recipe, these are only the changes I made)
  • I didn't have roasted tahini, so I ground up some roasted sesame seeds. It was about 2 2/3 tablespoons to make 2 tablespoons of packed sesame seeds, and I just blended that right into the lemon juice and olive oil for the dressing. I also forgot the garlic, but didn't notice, and it was still fantastic.
  • I didn't have a shallot, so I used up 1/3 of a red onion I had leftover from a different recipe.
  • I used Trader Joe's Harvest Grains Blend instead of just couscous, because it's what was in my pantry. It's mostly couscous, but with a orzo, garbanzo beans, and red quinoa mixed in. Upgrade!
  • I also grilled up the leftover inside chunks of zucchini from yesterday's pasta adventure.
  • I sprayed the vegetables with my misto instead of brushing them, but who knows if this used less oil in the end. I sprinkled them with lemon pepper instead of just salt and pepper. It tasted very lemony (but not overly so) in the end, which I love.
  • Grilling took forever because I have a george foreman grill, but hopefully that helped with the oil problem.
  • I also didn't have fresh parsley, so I threw in a tablespoon and a half of dried.
The result was so delicious, it was addictive, and I had to fight the urge to eat the rest right out of the pan. It was the perfect end to an exhausting day.


Not a very exciting post for today, but I promise I'll make it up to you tomorrow with marinated portobello mushroom burgers! :)

Zucchini Pasta with Walnut Pesto (low-carb and low-calorie)

I had a pretty great Sunday. It started with my first-ever Zumba class and swimming with my good friend Nena (whose awesome Tech blog you can find here, btw). Afterward, there happened to be a farmer's market in the parking lot, so we got some cash and went produce hunting. I scored on a lot of goodies that will be sure to inspire many new recipes this week. Here's my loot:

GET IN MAH BELLY
Inspired by the unhealthy hummus we found there, we went back to my house and made the hummus that I posted yesterday, and then I started to think about what else I could make this week. I got some extra long zucchini that would make great noodles, and so much basil would have to become pesto. So yesterday afternoon I got to work, determined to make a delicious new pasta dish that would be as healthy as possible.

If you've never made zucchini noodles, you're missing out. Cooked just a little, zucchini closely resembles the texture of pasta, and when you add some sauce you can hardly tell the difference. It makes a great lasagna noodle as well. 

To cut the noodles, a special slicer is ideal. I have a mandoline slicer (this one) that can make julienned strips, but this spiral slicer is officially on my wish list. If you don't have the appropriate slicer or the cash to splurge on one right now, you can use a vegetable peeler to create long, flat, linguine-like shreds. I don't recommend just using a knife for this, though. I tried it once, and the results were not worth the time and effort required.

Whether you peel the zucchini first is up to you - it's really just a question of aesthetics and nutrition. The skin adds a bit more color and fiber, but I'd recommend peeling your zucchini if it isn't organic, to reduce your chemical intake. However you choose to slice your noodles, stop when you get to the seeds. I like to save the insides for other recipes - they're good grilled! :)

If you want more info on the various ways to prepare zucchini noodles, check out this thorough Wikihow article

Ummm, hi.

Onward to the recipe!

Hollylujah Hummus

Hummus, you know I love you. You're the perfect dip and sandwich spread, you are a delicious and easy source of protein, but we've got to talk. You're packed with oil, and everyone knows it. You're not fooling anyone. What we have is beautiful and I don't want it to end, but just hope I can change you, so that I can enjoy you without all of the guilt.

Turns out hummus is pretty flexible. Check out this new and improved version of my love, with a quarter of the oil, half the salt, and all of the taste.

Inspired by and adapted from my favorite hummus recipe, which you can find here.


Hollylujah Hummus Recipe

Ingredients

  • 1 can garbanzo beans/chickpeas, rinsed and drained
  • 1/4 cup tahini
  • 1/4 cup lemon juice
  • 1 clove garlic, minced
  • 1/2 tbs. olive oil
  • 1/2 tsp. sea salt
  • 1/2 tsp. cumin
  • 3-5 tablespoons low-sodium vegetable broth or water
  • a few dashes of paprika (optional)

Method

  1. Begin by blending the lemon juice and tahini in a food processor or blender. Scrape the sides between blending to keep everything evenly mixed.
  2. Add the garlic, olive oil, salt, cumin, and 3 tbsp. of broth or water and blend a few more times, scraping in between.
  3. Slowly add the garbanzos/chickpeas and continue to blend, adding more broth or water to reach the desired consistency.
  4. Serve with a few dashes of paprika if desired!


Roasted Kale Chips Recipe

Kale is one of those vegetables that can do no wrong. It's both nutrient-dense and versatile in recipes. My personal favorite uses are to either steam it and cover it with sauces and stews, or dehydrate/bake it into a crispy chip. Today I'll be sharing a quick and simple way to make a crunchy side dish of kale while you're preparing a meal. All you need is some kale, and any oil/seasonings that you like. This recipe is oven-baked, but stay tuned if you have a dehydrator, I have plenty of kale recipes for that!

Roasted Kale Chips Recipe

Ingredients (Serves 4-6)

  • 1 bunch kale, de-stemmed and cut into small pieces
    • I often use a bag of trader joe's organic tuscan kale, as I did in this post. Even with ready-to-go kale, however, you can de-stem a little further if you want just the leaves. I skipped that step this time, but I do it when I have more time, and recommend it!
  • Just enough oil to coat the kale, about 1/2 - 2tbs.
    • I often use olive oil, sometimes sesame or coconut when I'm going for a different flavor. Any oil will do!
  • Seasonings to taste 
    • I just used sea salt and crushed pepper today. I've done this with lemon pepper, sesame seeds, a little lemon or lime juice, 

Method

  1. Preheat oven to 250° F. (You can do 300° F or possibly higher if you're in a hurry or baking something at a different temp, just be prepared to check the oven often to avoid burning.)
  2. Prepare your kale, and toss in a bowl with the oil and seasonings until coated evenly. I use my Misto sprayer to use as little oil as possible while still evenly coating the chips. That's why I'm not sure exactly how much I'm using :)
  3. Spread the kale evenly on a baking sheet or two, and bake for 15-20 minutes until crispy. Check the oven often and rearrange the chips if necessary to insure even baking. The exact time will depend on your oven, the temperature you bake it at, and how much oil you used, so the first time you make these you'll figure out what works best for you.
  4. When they're done, remove from the oven and enjoy immediately! If you manage to have any leftovers, store them in the refrigerator and reheat in the oven at 200° F. 


I made these while I cooked Happy Herbivore's Caribbean Sweet Potatoes (which is one of my favorite recipes for using up apples). That recipe is from Everyday Happy Herbivore, which can be found here.

Have a beautiful Sunday!

5 of my most-used kitchen gadgets

The more I cook, the more unique cooking gadgets seem to accumulate in my kitchen. Some have been impulse purchases for which the novelty has worn off over time, and others have become essential tools in my kitchen arsenal. This post will focus on the latter: my favorite kitchen gadgets that I can't live without.

My five well-worn gadgets of the day.
  1. Mandoline slicer: If you do a lot of chopping and don't have a mandoline slicer yet, take a moment to ponder how much precious free time you have wasted on unevenly slicing vegetables. Don't worry, I didn't know what I was missing either. I bought my first mandoline slicer about 4 or 5 years ago when I decided to start making veggie chips and needed a super-thin, even cut. The one I bought has 6 settings, ranging from thick to super-thin slices, 
    as well as two mandoline cuts. I use it for everything. Beware of cuts, however, and consider investing in some cut-resistant gloves if you're clumsy like me (and refuse to use the included finger guard). Here's a link to the latest version of the mandoline slicer I bought (pictured below being dangerously used by me).
  2. My mandoline slicer in action while I made Quinoa Taboulleh
  3. Handheld juicer: So many recipes call for lemon or lime juice, and nothing beats fresh squeezed. A handheld juice press is the most efficient, simple option for juicing citrus fruits in small quantities, so it's a must have. I have this one, which is really affordable, but if you can afford to splurge, this fancy one looks like it can squeeze out every last drop.

    My juicer in action
  4. Nut milk bag: Did you catch my recent #TBT post on making your own nut milk? If you want to get serious about making homemade milks, a nut milk bag is the only way to go. You can try to drain your milk with cheesecloth or a fine mesh strainer, but that will either leave some liquid behind or a grainy texture in the milk (ick!). But with a nut milk bag, you can easily squeeze all of the milk you created, leaving all of the pulp behind. The experience is oddly similar to milking a cow, which I've never actually done, but I imagine this is the vegan equivalent. If that description wasn't too weird for you, check out this affordable nut milk bag and try it for yourself.
    My nut milk bag
  5. Mini blender: For blending jobs too small to warrant the use of a blender or food processor, there is nothing quite like a mini blender. Cleanup is easy and the uses are endless. Most come with both a blending and grinding blade, and several differently sized cups. I have the Magic Bullet, but hear great things about the Nutri Bullet as well.
    My mini blender making the dressing for Quinoa Taboulleh
  6. Goggles: I've been using goggles to chop onions way before Phil did it on modern family. My eyes are extremely sensitive and no other trick has worked to keep them tear-free while I cook. I use a pair of regular swim goggles, but you can buy Phil's fancy onion goggles here
    Proof that I am a nerd.
There you have it. Five things my kitchen would be incomplete without. I could write a book on my favorite cooking gadgets, however, so look for many more posts on this topic!

What are your cooking essentials? Let me know in the comments!


Chickpea Salad from Adventuresome Kitchen

Happy 4th of July! I hope you're all enjoying a nice relaxing day off with friends and family.

I'm headed to a potluck today, and found myself without a recipe last night. I texted some friends in a panic and told them I was thinking about a chickpea salad, and my lovely friend Jessica came to my rescue with this link. It was a miracle! I actually had almost everything on hand, and only needed to run to the store for a few things this morning. So this post is dedicated to Jessica, for saving my 4th of July :)


As usual, I made a few modifications (less oil, mostly!) to the recipe, which I'll explain in this post, but you can head over to Adventuresome Kitchen for the original recipe if you like.


Chickpea Salad (adapted from Adventuresome Kitchen)

Ingredients (Serves about 10)

  • 4 cans chickpeas (garbanzo beans) drained
  • 1 large sweet potato, peeled and diced into cubes
  • 1 large red onion, diced
  • 1 pint of cherry tomatoes, halved
  • 1 bag, or several bunches of spinach, torn into smaller pieces
  • 2 1/2 tbs extra virgin olive oil
  • 1/4-1/2 cup vegetable broth or water
  • 3 tbs red wine vinegar
  • 1 tbs dried rosemary
  • 1 tbs herbes de provence
  • salt and pepper to taste

Method

  1. Preheat the oven to 350° F. Dice the sweet potato and onion. Place in a large bowl with 1/2 tbs oil and stir.
    Place on a parchment paper-lined cookie sheet and sprinkle lightly with salt. Cook until softened - about 30 minutes.
  2. Drain chickpeas and place in a large bowl. Add tomatoes. When the sweet potato onion combo has finished cooking, add to the bowl.
    I had a few different brands of chickpeas lying around. Can you see the color difference?
  3. Place the torn spinach and 1/4 cup vegetable broth into a large pan and heat over medium heat. Saute until the greens are barely wilted- about 2 minutes, adding more liquid if necessary. Add to the bowl.
    Magically shrinking spinach
  4. Whisk together the remaining 2 tbs oil, red wine vinegar, and herbs, and pour over salad.
  5. Using a large spoon, gently toss all the ingredients together.
  6. Salt and pepper to taste, and enjoy!

We'll be heading to the potluck with this, some blue corn chips and salsa, and a red summer wine. Hope you have a beautiful day!

Nutrition (Per 1 1/4 cup serving)


  • Calories: 219
  • Total Fat: 6.7 g
    • Saturated: 0.5 g
    • Polyunsaturated: 0.4 g
    • Monounsaturated: 2.5 g
    • Trans: 0 g
  • Cholesterol: 0mg
  • Sodium: 430.5 mg
  • Potassium: 219 mg
  • Carbs: 37.9 g
    • Fiber: 12 g
    • Sugars: 4.6 g
  • Protein: 9.8 g
  • Vitamin A: 114.7%
  • Vitamin C: 18.8%
  • Calcium: 9.5%
  • Iron: 41%

Homemade Almond Milk Recipe

On this throwback thursday, I'm updating a post I wrote for Urban Remedy last year. This predates my DSLR, so please forgive my shoddy iPhone photography and enjoy!

A Great Source for Non-Dairy Milks: Your Kitchen


Non-dairy milks are wonderfully versatile. They are delicious in smoothies, juices, baked goods, or over your morning granola. Not all store-bought alternatives are completely safe, however, and some contain ingredients that are worth mentioning.

When you read a non-dairy milk label, most of the foreign ingredients you see are added vitamins and minerals. However there is one common ingredient that should raise considerable alarm.

Carrageenan, a seaweed derivative, is commonly used as a thickening agent, stabilizer, or emulsifier in many non-dairy products. It may sound harmless, but recent research from the Cornicopia Instutite has linked carrageenan to a number of digestive issues, including colon inflammation and cancer, in animals.

Since it can be difficult and time-consuming to find products without carrageenan, the Cornucopia Institute has created a helpful shopping guide.

If you want the freshest, most natural non-dairy milk possible, a great option is to make it yourself. It is surprisingly simple to make your own non-dairy drinks, using nuts, seeds, or grains.

How to Make Your Own Nut Milk

This is a simple recipe for homemade nut milk, using only nuts, water, and a blender (and a few other optional items). You can get creative and try this with any nut or seed, even a combination!


  • Soak one cup of nuts (almonds are a popular choice, but any nut or blend of nuts will do) in water for at least 8 hours, or overnight.
  • This is optional, but you may want to blanch (remove the skins) if you are using almonds or hazelnuts. This can improve the taste and texture of your milk, but is not required.
  • Drain the nuts completely. Combine with 2-3 cups of water in a blender or food processor, and mix until that familiar creamy color is achieved. If you prefer some extra flavor or sweetness, you can try adding a bit of sugar, dates, vanilla, and/or cinnamon before you blend.

Homemade almond milk: before and after blending (using unblanched almonds)

  • You can use cheesecloth, a fine mesh strainer, or a convenient nut milk bag to strain the milk.

A nut milk bag.
A nut milk bag is a fine mesh bag that you pour your milk through and squeeze to drain. This is the easiest way to separate your milk from the pulp, which you can then save for other recipes*. It helps if you have a large funnel as well, which allows you to squeeze your milk directly into the container you will store it in.

Bottle it up and refrigerate. Be sure to shake your new milk well before using, and use within 7-10 days.

It’s that simple. You’ll have complete control over what you are drinking, and you can make just the amount you need. It’s a dairy-free miracle.


*I always save the pulp from my almond milk and dehydrate it to make almond flour, vegan parmesan, and use in place of bread crumbs in recipes. I'll write about that soon!

Quinoa Tabbouleh Recipe

I have a bit of an obsession with tabbouleh. It's a middle eastern salad made with a refreshing combination of fresh parsley and mint, tossed with lemon juice, tomatoes, and bulgur wheat. As a vegan I like to pack in a little more protein wherever I can, so I prefer to make it with my favorite superingredient, quinoa.

I've tried several different recipes for quinoa tabbouleh that I've found online, but the one from Epicurious is by far my favorite. Recently I've made some changes to it to make it a bit healthier and easier to prepare. 

Behold: a nutritious, delicious summer salad that you can grab and take anywhere. You can substitute the cucumber or add just about any of your favorite salad veggies here, and it's also great served over shredded romaine lettuce (might want to make more dressing, though).

Hello, I'm delicious.

Quinoa Tabbouleh Recipe (adapted from Epicurious.com)

Makes 6 servings

Ingredients

  • 1 cup dry quinoa
  • 1 pint cherry tomatoes, halved
  • 1 large cucumber or 2-3 small, sliced into half moons
  • 1/2 red onion, diced
  • 2 tbsp lemon juice
  • 1/4 cup (4 tbsp) olive oil
  • 1/4 cup (4 tbsp) low-sodium vegetable broth (or water)
  • 1 garlic clove, minced
  • 2/3 cup flat-leaf parsley
  • 1/2 cup fresh mint
  • 1 tsp lemon pepper seasoning (optional)
  • Salt and Pepper to taste

Method

  1. Thoroughly rinse the quinoa in a fine mesh strainer. This step is very important to remove the bitter coating.
  2. Cook the quinoa in 1 1/2 cups water and a few dashes of salt. I like to make mine in a rice cooker, but a pot works too. Stir frequently to prevent burning, and cook until the water is absorbed and the quinoa is tender, roughly 10-15 minutes. 
  3. Set aside in a large bowl until cooled to room temperature, and then refrigerate. I like to prepare my quinoa several hours or even a day in advance, so that it is fully chilled when I prepare the rest of the tabbouleh.
  4. Add chopped tomatoes, cucumber, and onion to chilled quinoa.

  5. Pick leaves from parsley and mint and add to blender. A mini blender works great if you have one, but a large one will do. You can also just chop the herbs and then stir in the liquids.
  6. Add the olive oil, vegetable broth (or water), garlic, lemon pepper, salt and pepper to the blender. Pulse a few times until the herbs are finely chopped (but not pureed) and the ingredients are all well mixed.

  7. Pour the dressing over the salad and stir to combine.

  8. Eat joyously.
That's a happy bowl.


Nutrition (Per 1 1/2 cup serving)

  • Calories: 314
  • Total Fat: 16.3 g
    • Saturated: 2.1 g
    • Polyunsaturated: 2.5 g
    • Monounsaturated: 10.9 g
    • Trans: 0 g
  • Cholesterol: 0mg
  • Sodium: 371.2 mg
  • Potassium: 644.7 mg
  • Carbs: 37.8 g
    • Fiber: 4.4 g
    • Sugars: 3.8 g
  • Protein: 7.1 g
  • Vitamin A: 26.1%
  • Vitamin C: 53%
  • Calcium: 7.3%
  • Iron: 29.9%

Special thanks to my friend Nena for taking some of the photos for this post.
You can check out her blog here.


Black Bean Tofu Scramble

I love to cook, and while I frequently make modifications to recipes, I very rarely create my own from scratch. This morning I decided to make an exception and throw together a tofu scramble with what I had lying around. The result was a very versatile recipe that can easily be adapted to suit whatever is currently in your kitchen!

I had one half of a twin pack of organic sprouted tofu from Trader Joe's, some veggies, spices, and an onion. Here's what I came up with:


Ingredients (fills 8 tortillas)

  • 1 tbsp olive oil (or 1/4 cup water or vegetable broth, if you are limiting fats)
  • 1/2 onion, diced (roughly 1 cup, and I used red)
  • 2/3 cup bell pepper, chopped (any variety, I used a frozen mix)
  • 1 jalapeño, diced (optional, and can be seeded to lower heat - but I like it spicy!)
  • 1 clove garlic, minced (I adore frozen Dorot cubes)
  • 7.5 oz tofu, drained and pressed
  • 1/2 can black beans, rinsed and drained
  • 1/2 tsp cumin
  • 1/2 tsp turmeric
  • 1/2 tbsp chili powder
  • salt and pepper (or other seasonings) to taste
  • Tortillas
  • Your favorite salsa (Mine is Trader Joe's habanero and lime) 
  • Toppings of your choice (spinach, tomatoes, avocado, cilantro, etc!)
This recipe can easily be doubled if you have more tofu and veggies on hand, and most anything can be tweaked to suit your tastes.

Method

  1. Drain the tofu and slice into 1-2 inch thick slabs. Set a few layers of paper towels on a plate, lay the tofu on top, and cover with more paper towels and another plate. This will "press" the tofu and the paper towels will absorb any excess moisture. Let this sit for a few minutes while you prepare the other ingredients.


  2. Discard the paper towels and mash the tofu with a fork, until crumbly.
  3. Heat the oil (or substitute) in a large pan over medium heat. Add the onion, peppers, garlic, jalapeño (if using), and a few dashes of salt. Saute for 2-3 minutes.

  4. Add the tofu, spices, and black beans and stir to combine. Cook for another 3-5 minutes, then remove from heat and season to taste.

  5. Warm the tortillas with your preferred method (I like heating them straight over a flame)

  6. Fill each tortilla with scramble and top with salsa. Then add whatever other toppings you like! I chopped some spinach and cherry tomatoes, but I can't wait to try this with avocado!

Want to try this recipe? Have any questions or suggestions? Let me know in the comments!


Nutrition (Per 1/8 serving, scramble only)


  • Calories: 78
  • Total Fat: 3.4 g
    • Saturated: 0.6 g
    • Polyunsaturated: 0.2 g
    • Monounsaturated: 1.3 g
    • Trans: 0 g
  • Cholesterol: 0mg
  • Sodium: 160.5 mg
  • Potassium: 46.7 mg
  • Carbs: 8.1 g
    • Fiber: 2.2 g
    • Sugars: 1.4 g
  • Protein: 4.6 g
  • Vitamin A: 12.2%
  • Vitamin C: 34.9%
  • Calcium: 7.5%
  • Iron: 6.3%